A granite countertop can change the way a kitchen looks and works. However, the final result depends on much more than choosing an attractive slab. Careful design, exact measurements, skilled cutting, and proper installation all play a major role. When I guide a homeowner through this process, I focus on both beauty and daily use.
Homes in Milwaukee come in many styles, from older houses with detailed woodwork to newer homes with open layouts. Therefore, I never treat granite as a one-size-fits-all product. Instead, I look at the room, cabinet shape, lighting, cooking habits, and storage needs before I recommend a design.
Why Professional Granite Work Matters
When I help clients plan custom granite countertops Milwaukee, I start with the way they use the room each day. For example, a busy family may need more workspace, rounded corners, and an easy-to-clean layout. Meanwhile, someone who cooks often may want a large preparation area near the sink and stove. Because the design fits the user, the finished surface feels natural instead of forced.
Professional work also protects the stone. Granite is strong, but poor cutting or weak support can still cause cracks, uneven seams, or movement. Therefore, I make sure the plan includes safe overhangs, proper support, and clean edge details. As a result, the countertop looks polished and performs well for years.
Key Takeaways
- Good granite starts with a clear design plan.
- Exact fabrication helps seams, sinks, and edges fit correctly.
- Professional installation supports long-term strength and daily comfort.
Granite Design Begins With the Room
Before I think about color, I study the room itself. First, I look at the size and shape of the kitchen. Then, I check doorways, windows, appliances, and traffic paths. This step matters because a beautiful slab cannot fix a poor layout.
I also ask how the homeowner uses the space. For instance, some people need room for baking, while others need a breakfast bar for children. In addition, a homeowner may want more space around a cooktop or a wider landing area beside the refrigerator. Therefore, the design should solve real daily problems.
Lighting also affects the final choice. A dark slab may look rich in a bright room. However, the same stone may make a smaller kitchen feel heavy. On the other hand, a lighter granite can make a compact room feel more open. Because natural stone has movement and color changes, I always consider how it will look under both daylight and indoor lighting.
Read More Find Best Kitchen Countertops
Choosing the Right Granite Slab
Granite comes in many colors, patterns, and levels of movement. Therefore, I encourage homeowners to look at the full slab rather than a small sample. A sample may show the base color, but it may not reveal large veins, spots, or changes across the stone.
First, I compare the granite with the cabinets. Warm brown, gold, and cream tones often work well with wood cabinets. Meanwhile, black, gray, or white granite can create a cleaner look with painted cabinets. However, there is no single rule. The right choice depends on the mood of the whole room.
Next, I compare the slab with the flooring and backsplash. Because these surfaces sit close together, they should support one another instead of fighting for attention. If the granite has a bold pattern, I may suggest a calmer backsplash. However, if the slab has a quiet pattern, the room may handle more detail elsewhere.
I also think about long-term appeal. A dramatic slab can become the main feature of the kitchen. In contrast, a softer pattern can give the room a calm and lasting style. Therefore, I help clients choose a stone that fits both their current taste and the character of the home.
Accurate Measurements Prevent Costly Problems
Measurements form the base of successful granite fabrication. Therefore, I take this stage seriously. Even a small error can affect the wall fit, sink opening, seam position, or appliance clearance.
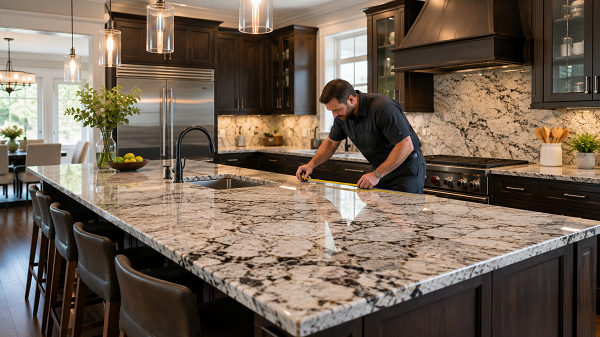
During templating, I record the exact shape of the cabinets and walls. I also mark sink locations, faucet holes, cooktops, outlets, and any unusual corners. Because many walls are not perfectly straight, I do not rely only on basic room measurements.
Overhangs also need careful planning. A standard countertop edge may need less support than a wide breakfast bar. Therefore, I check the depth, stone thickness, and support system before cutting begins. This planning helps reduce stress on the granite.
In addition, I review seam placement early. Large kitchens may need more than one piece of stone. However, smart seam placement can make the joints less noticeable and much stronger. I usually place seams where the cabinet structure gives good support and where the pattern can flow naturally.
What Happens During Granite Fabrication?
Fabrication turns a raw slab into a finished countertop. First, the fabricator studies the template and places it over the stone. This step helps control the pattern direction, color balance, and seam location.
Next, special equipment cuts the slab into the planned shape. However, machines alone do not create a quality result. Skilled workers must watch the stone, check each cut, and adjust the plan when needed. Because every granite slab has unique mineral patterns, experience matters.
After cutting, the fabricator shapes the edges. Common options include eased, beveled, bullnose, and more detailed profiles. A simple edge often suits a clean kitchen. Meanwhile, a rounded edge can feel softer and may work well in a busy family home.
The team also cuts openings for sinks and cooktops. Therefore, the fabricator must follow the appliance and fixture details closely. An opening that is too large or too small can create serious problems during installation.
Finally, the fabricator polishes the exposed edges and checks every piece. At this stage, I look for smooth edges, correct dimensions, clean openings, and good pattern flow. As a result, the installer receives countertop pieces that are ready for the room.
Edge Profiles Add Character to Granite
The edge profile may seem like a small detail. However, it can change the style and feel of the full countertop. Therefore, I review edge choices with the homeowner instead of treating them as an afterthought.
Eased Edge
An eased edge has a simple shape with slightly softened corners. Because it looks clean and works with many cabinet styles, it remains a common choice. It is also easy to clean and does not draw attention away from the granite pattern.
Bullnose Edge
A bullnose edge has a fully rounded shape. Therefore, it creates a softer appearance and removes sharp corners. It can work well in homes with young children or in kitchens with traditional cabinets.
Beveled Edge
A beveled edge includes an angled cut along the top. As a result, it creates a clear line that catches the light. This profile may suit a more formal or detailed kitchen design.
Decorative Edges
More detailed edges can add a traditional or high-end look. However, they may cost more because they require additional cutting and polishing. Therefore, I recommend matching the edge detail with the cabinets, room size, and project budget.
Planning Sink and Faucet Openings
Sink style also affects the fabrication process. An undermount sink creates a smooth opening and makes it easier to wipe crumbs into the basin. However, it needs accurate cutting, polished edges, and strong mounting.
A drop-in sink rests on top of the countertop. Therefore, the sink rim covers the cut edge. This style may require a different opening size and more space around the sink area.
Faucet holes, soap dispensers, air switches, and water filters also need early planning. Therefore, I ask clients to choose these fixtures before fabrication begins. When we know the exact fixture sizes, the fabricator can place each hole correctly.
I also check the space between the sink, backsplash, and faucet. A large faucet may need more room to move freely. In addition, nearby windows or shelves may affect the faucet height. Careful planning helps prevent these common problems.
Matching Granite With Cabinets and Flooring
Granite should connect with the other surfaces in the room. Therefore, I never choose it without looking at the cabinets, flooring, wall color, and backsplash.
Light cabinets can work with both light and dark granite. For example, a deep granite color can add contrast to white cabinets. Meanwhile, a light slab can create a soft and open appearance.
Wood cabinets often contain warm red, brown, gold, or orange tones. Therefore, I look for granite that supports those colors without making the room feel too dark. Cream, beige, brown, and mixed-color slabs may work well.
Gray cabinets can support a wide range of granite choices. However, the undertone matters. A cool gray cabinet may clash with a warm yellow stone. Therefore, I compare samples together under the room’s actual lighting.
Flooring also affects the final balance. If the floor has a strong wood grain or busy tile pattern, I may suggest quieter granite. On the other hand, a plain floor can support a slab with more movement and contrast.
Professional Installation Protects the Countertop
Installation brings every earlier step together. First, the installers check the cabinets. They confirm that the cabinet tops are level, secure, and ready to carry the stone.
Next, the team carefully brings each granite piece into the room. This stage requires planning because long pieces can be heavy and difficult to move through doors or tight corners. Therefore, the installers use enough workers and proper lifting methods.
After placing the stone, the team checks the fit against the walls and cabinets. They also join the seams, secure the sink, and confirm that the overhangs have enough support. Because small adjustments may still be needed, experienced installers inspect the surface from several angles.
A good installation should feel solid and look balanced. The seams should sit flat, the edges should line up, and the sink opening should look clean. In addition, the countertop should not rock or place uneven pressure on the cabinets.
Common Granite Project Mistakes
One common mistake is choosing a slab only from a small photo. However, granite can look very different across a full surface. Therefore, I recommend viewing the complete slab whenever possible.
Another mistake is selecting the countertop without considering the cabinets, floor, and lighting. As a result, the room may feel too busy or too dark. Instead, I compare all major finishes together.
Some homeowners also delay choosing the sink or cooktop. However, fabrication depends on exact model details. Therefore, early fixture choices can prevent delays and cutting errors.
Poor seam planning creates another risk. A seam in the wrong place may stand out or lack proper support. Because of this, I review the seam location before the slab enters fabrication.
Finally, some people focus only on the starting price. Budget matters, but a low quote may leave out templating, sink cutouts, edge work, delivery, or installation. Therefore, I compare the full project scope instead of looking only at one number.
Caring for Granite After Installation
Granite care is usually simple. First, I suggest wiping spills with a soft cloth and mild soap. Because harsh cleaners can affect the sealer or leave a dull film, gentle products work better for daily cleaning.
I also recommend using cutting boards. Granite can resist scratches, but knives may become dull, and repeated cutting may mark certain areas. In addition, trivets can protect the surface from sudden temperature changes.
Sealing needs vary by stone. Some granite may need sealing from time to time, while other slabs may need it less often. Therefore, I suggest testing the surface and following the fabricator’s care advice.
Spills should be cleaned quickly, especially oil, wine, coffee, and dark sauces. However, fast cleanup does not need to feel stressful. A simple daily routine can keep the surface fresh and attractive.
Working With a Local Countertop Team
A nearby team can make the process easier because design, measurement, fabrication, and installation stay connected. When I work with a Milwaukee countertop store, I can view materials, discuss edge choices, and confirm project details with people who understand local homes.
Local service also helps when a project needs a site visit or adjustment. Therefore, communication often feels faster and clearer. In addition, homeowners can ask direct questions about lead times, slab availability, sink options, and installation steps.
Questions to Ask a Granite Fabricator
Before approving a project, I suggest asking a few direct questions:
- Does the quote include measurement, fabrication, delivery, and installation?
- Can I view the full granite slab before cutting?
- Where will the countertop seams be placed?
- Which edge profiles are included in the price?
- Who will disconnect and reconnect the plumbing?
- What support will a wide overhang need?
- Are sink and cooktop cutouts included?
- What warranty or service support is provided?
- How should I care for the stone after installation?
These questions help set clear expectations. Moreover, they make it easier to compare service providers fairly.
Final Thoughts
Professional granite work combines thoughtful design, exact measurement, careful fabrication, and safe installation. Therefore, I never judge a countertop by the slab alone. The planning and skill behind the stone have just as much effect on the finished result.
When each step receives proper attention, the countertop fits the room, supports daily tasks, and adds lasting character. As a result, the kitchen feels more complete, comfortable, and valuable. For me, that balance between beauty and function makes professional granite design and fabrication worth the investment.