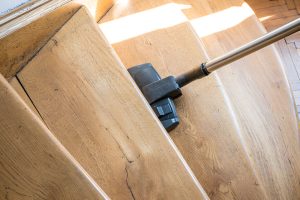
When it comes to sanding the staircase and refinishing it, the edges are often the most challenging part to get just right. Proper edge sanding is important to achieve a smooth, professional finish that helps enhance the beauty and durability of your wooden stairs.
And, having said that, knowing the right techniques and tools to use can make all the difference in obtaining the results you want. So, in this blog, we will share essential tips for effective edge sanding on stairs to help you get the perfect result every time.
Edge Sanding On Stairs: Six Effective Tips For Better Results
1. Prepare The Steps
Preparing the steps is a crucial first step to achieve a professional-like finish. So here are some tips to prepare the steps and make the area clear:
- First, remove rugs, furniture, or decor from the staircase and nearby areas.
- Second, use painter’s tape to protect baseboards, walls, and any other surfaces you don’t want to sand or damage.
- Third, put on safety goggles, a dust mask, and hearing protection to safeguard yourself from dust, debris, and noise during sanding.
- Fourth, inspect the stair treads and edges carefully for exposed nails or screws that could damage your sanding tool or cause uneven sanding.
2. Choose The Right Sander
Sanding the edge requires handling, especially around corners, curves, and tight spots. So considering this, make sure to use the right sander, such as an edge sander or palm sander, as it gives you better control and allows you to work on intricate areas without damaging the surrounding wood.
Using a belt sander or an orbital sander might be some of the best ways to dust-free sanding or levelling uneven surfaces, but they can prove too bulky for stair edges and may end up causing gouging. Moreover, it may also result in uneven sanding or dips in the wood.
The right sander just provides a consistent sanding finish, which is the key to achieving a professional look and avoiding marks, swirls, or even rough spots that may appear once the stairs are stained or finished.
3. Always Test The Sandpaper
This might sound atypical but testing the sandpaper before you begin sanding the staircase edges is essential for more than just one reason. Let’s explore them.
- Testing helps ensure the sandpaper’s grit is suitable for the wood type and finish. If you use sandpaper that’s too coarse, you may end up damaging the edges or leaving deep scratches or gouges. On the other hand, sandpaper that’s just too fine may not remove the old finish effectively.
- Testing allows you to gauge how evenly the sandpaper works on the edge. This helps prevent uneven sanding, which can result in dips, scratches, or an inconsistent finish.
- Starting with the right grit after a test run minimises the need to go over the same area multiple times, which makes the overall process quicker and more efficient.
- Most importantly, different woods respond differently to sanding, so testing the sandpaper ensures you’re preserving the wood’s integrity without over-sanding or thinning it in sensitive areas.
4. Begin With A Coarse Grit
In addition to testing the sandpaper, equally important is to begin with a coarse-grit sandpaper (80) and then, gradually move to finer grits (120) and (180). A coarse grit removes material at a faster rate, which allows you to quickly smooth out any rough edges or imperfections. This helps to shape the edges and prepare them for subsequent sanding.
Using a finer grit too early can cause the sandpaper to burn the wood, which can leave behind unsightly marks. Starting with a coarser grit ensures that the wood is removed gradually, preventing this issue.
In simple words, by progressing through the grits systematically, you can ensure that the edges have a uniform finish.
5. Use A Detail Sander For Corners
Detail sanders also ensure effective edge sanding on stairs, particularly on the corners. These tools have a triangular-shaped sanding pad that allows you to sand corners and crevices of the edges with precision. This makes sure that every part of the stair edges, even the tightest spots, is properly sanded.
Moreover, they are lightweight and easy to manoeuvre, which makes them ideal for working on stairs, which often require moving in various positions to get the right angle.
6. Vacuum And Wipe Between Grits
 Vacuuming and wiping between grits while sanding the edges is essential because as you sand, small dust particles and wood debris accumulate on the edges. If not removed, these particles can get trapped under the sandpaper and cause scratches or swirl marks when you move to a finer grit.
Removing dust between grits allows the finer sandpaper to work efficiently, producing a smooth and even surface. A clean surface allows stains, paints, or sealants to absorb evenly into the wood. Dust left behind can clog the wood’s pores, resulting in patchy or uneven finishes.
Bottom Line!
So, it’s not sanding the staircase that seems so tricky a task, but rather the edges. Sanding the edges requires a careful approach, and without proper care, you could end up damaging your staircase edges.
Nonetheless, by understanding the right approach to effective edge sanding on stairs, you can sand your staircase edges the right way and ensure optimal results, avoiding any potential damage.
You Can Also Read: How To Repair Parquet Flooring?
